How to Change the Needle on a Sewing Machine
Changing the needle on a sewing machine is an essential skill that all sewing enthusiasts should learn. Sewing is a fun and artistic thing to do. No matter how good you are at sewing, you must know how to change a needle to keep your stitches looking good and ensure your sewing session goes smoothly. This detailed guide will show you how to change the needle on a sewing machine and give tips on making the process go smoothly.
How to Know How Important a Sharp Needle Is
Before we get to the how-to, let’s quickly discuss why changing the needle is essential when sewing. The needle is a small but essential part of your sewing machine. The state of the needle directly affects the quality of your stitches. Needles can break, bend, or grow dull with time, which can cause uneven stitching, snags in the fabric, and annoyance when sewing.
Changing the needle regularly assures:
- Consistent Stitch Quality: Your sewing projects will look better overall if you use a sharp needle to create even, clean threads.
- Preventing cloth Damage: Bent or dull needles can snag or tear your cloth. Avoiding needless wear and tear is facilitated by a fresh needle.
- Silky Sewing Experience: Using a new needle minimizes the chance of thread breakage and other sewing machine problems, resulting in a smoother stitching experience.
How to Change the Needle on a Sewing Machine: Step-by-Step Instructions
Now, let’s get practical and go over how to change the needle on a sewing machine step-by-step.
Step 1: Assemble Your Materials
Before starting, assemble the necessary materials:
- A brand-new sewing machine needle (be sure the size and type fit your fabric).
- A little screwdriver (which your sewing machine should come with)
- The user needlebook for your sewing machine (for particular instructions)
Step 2: Unplug and turn off the power
For safety, make sure your sewing machine is unplugged and turned off.
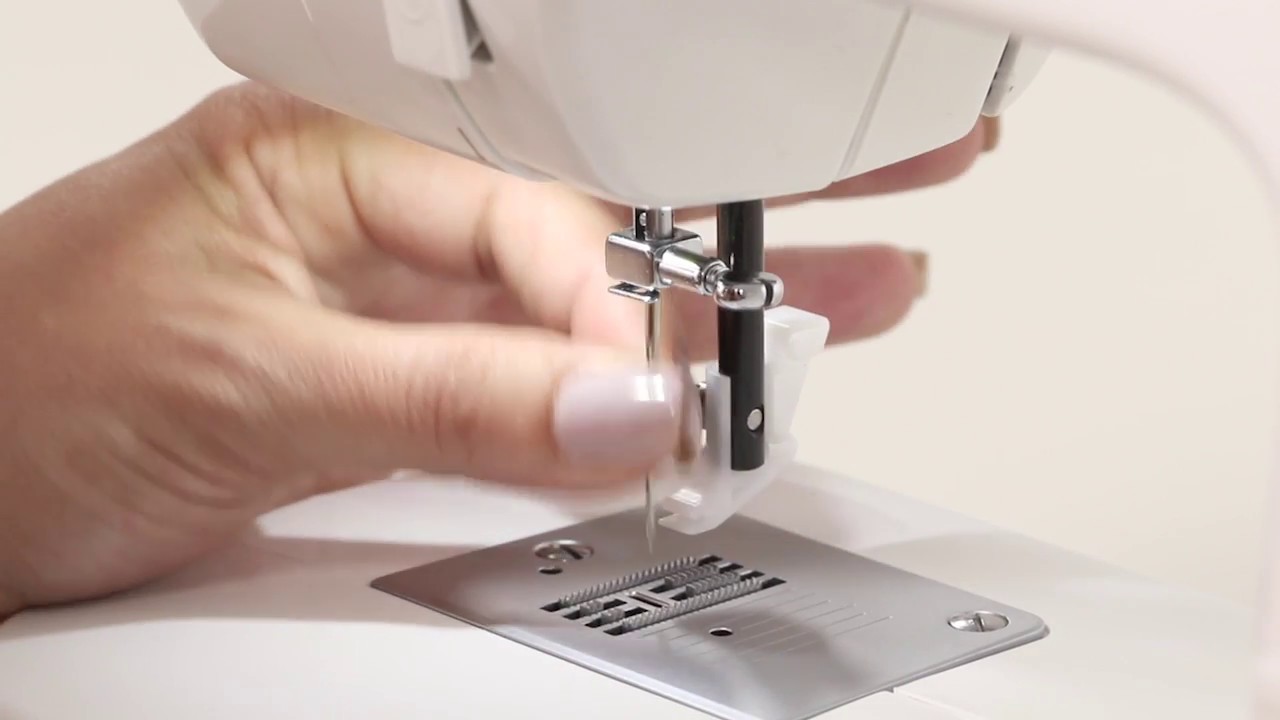
Step 3: Take Out the Old Needle
- Raise the Needle: To raise the needle to its highest point, turn the needle wheel in your direction (anticlockwise).
- Loosen the Screw: To loosen the needle clamp screw, use the tiny screwdriver. To release the old needle, turn the screw counter-clockwise, but do not remove it all the way.
- Extract the Needle: Carefully extract the old needle from the needle clamp by pulling it down. The needle can be hot if you last seen a while ago. Proceed with caution.
Step 4: Put the Fresh Needle in
- Verify the Needle Type: Make sure your needle type and size are appropriate for the fabric you are using. For help, see the needle box or the needlebook with your sewing machine.
- Insert the Needle: With the rounded side facing you and the flat side facing the back, insert the fresh needle into the needle clamp. As far as it will go, push it up.
- Tighten the Screw: To tighten the needle clamp screw, use a screwdriver firmly. Make sure it’s tight, but don’t overtighten it since this could break it.
Step 5: Verify the Needle Position
Please ensure the needle is firmly fastened and positioned correctly by rechecking it. To ensure the needle doesn’t strike the presser foot or any other components, lower the presser foot and turn the needle wheel in your direction.
Step 6: Test Sew Using Repurposed Fabric
Make sure the new needle functions correctly by sewing a few test stitches on scrap fabric before beginning your project. Verify the stitching for smoothness and any strange noises.
Conclusion:
Despite its seemingly insignificant nature, changing the needle on your sewing machine is crucial to the success of your projects. You will have a smoother sewing process and produce results that seem professional if you follow these instructions and incorporate appropriate needle maintenance into your routine. Enjoy your stitching!